Tuesday, June 21, 2011

Numbers and Movement


Eden has struggled a bit with counting beyond eleven. She has also struggled to recognize double digit numbers. We have flash cards and have tried a variety of ways to make it interesting. Today we found one that seems to have been both fun and effective.

I made a chart of physical activities for each number 1-20. For example:
1 - Split
2 - Somersaults
3 - Push Ups

etc.

I then held the flash cards number-side down and she randomly chose one. Then we both did that exercise for that number of repitions. It was great because she had to count with each exercise (obviously 1 split or 2 somersaults didn't require great counting but a 20 second plank required counting all the way up to 20!).

We had lots of fun and her counting and number recognition seemed to improve during the activity. I think it is definitely something we can repeat and when it gets too routine, I can mix it up with new exercises.

It was also good because Eden was not blessed with the most coordinated genes (but man can she perform!). It was good for her to use her body in ways that she hasn't tried before. She complained that her abs hurt (she didn't know they are called abs but she showed me where her stomach muscles hurt).

All in all this was a great activity and we'll be doing it again.

Thursday, May 26, 2011

Freezer Jam

This is not an advertisement for Ball caning products, but it could be.

I love making freezer jam. I love the plastic 8 oz containers with the screw tops that Ball makes. I love that they are the perfect size. I love that the bottom clicks into the top of the lid so that they stack perfectly. I love that they are easy to wash and reuse (I use them for all kinds of things after the jam is gone).

I prefer jam made with Sure-Jell pectin rather than Ball instant pectin. It tastes better. And why wouldn't it? It has TONS more sugar. So, because it uses less sugar and because it doesn't require any preparation (you just dump the powdered pectin in with your sugar), I use Ball pectin. It also works with Splenda which is a nice alternative for diabetics. I love that I can make 5-8oz containers of jam in about 20 minutes. How easy is that?

Last fall I bought some fresh/frozen blackberries from Oregon (they are actually from a farm on the same road that my high school and church are on). I put the berries in freezer bags and tonight it was so easy to pull out one of those bags (I'd already defrosted it in the fridge) and just moosh the berries right in the bag, pour them into my measuring cup and then add them to the sugar/pectin mixture, stir for 3 minutes, then ladle them into my handy containers, let them sit 30 minutes and pop them into the freezer.

It REALLY is that easy! The taste of fresh berries* to last throughout the year!
*I like my jam to be fairly chunky, with pieces of berry in it. If you want a smoother texture, you'll have to work a little harder at mixing and straining. Raspberries are so seedy that I usually strain half and leave half chunky so that when mixed I get my desired chunkiness without all those seeds. Strawberries are less juicy and so they require a little more mooshing. I like to use my blender for strawberries and then I lightly chop a few so that I get the chunky-factor. I've never done fruit jams (just berry ones) but this summer I'm going to experiment. I'll keep you posted.

Monday, May 16, 2011

Awesome Pizza Dough Recipe

I found a recipe online and then tweaked it a bit (of course). The original is Jay's Signature Pizza Crust on allrecipes.com.

The crust turned out really great. It had a really light texture, was crunchy on the outside and soft on the inside. The flavor was great too. It is fairly easy to make (you do need to plan on starting your dough about 2 hours before you plan to eat though).
Here is a piece of our pizza from last night. See how yummy that crust looks!
Ingredients: (for two large pizzas or three medium pizzas)
  • 1 T active dry yeast
  • 1 t brown sugar (or honey)
  • 3 C warm water
  • 2 t salt
  • 1/4 C olive oil
  • 5 C all-purpose flour
  • 1 1/2 C wheat flour


Directions:

  1. In a large bowl (or your Kitchen Aid bowl), dissolve the yeast and sugar in the water. Let sit 10 minutes (be patient and let it sit).
  2. Add the salt and oil and mix.
  3. Add half the white four and all of the wheat flour. Mix.
  4. Knead in the remaining flour until the dough is no longer sticky and has a nice smooth texture.
  5. Place the dough in a well oiled bowl (let's be honest, I just lifted the dough, sprayed my already-used bowl with olive oil spray and then plunked the dough back into it, I then sprayed the top of my dough with a little of the olive oil spray).
  6. Cover and let rise until double (approximately 1 hour).
  7. Punch down dough and form into balls (3 for 3 pizzas, etc.). Let it relax a bit before you start to spread it.
  8. Form into the shape of your pizza pan. Because the dough is quite rubbery, I found a small (like fits in my hand) roller to be essential. Before Phil bought me said roller, I would use a small glass and that worked as well.
  9. Preheat your oven to 425 and then top your pizza with your favorite toppings.
  10. Bake until the cheese and crust are golden brown (about 15-20 minutes).

Monday, May 2, 2011

Chocolate Cake (no eggs)

Today we made cupcakes and then gave them away (while asking for a donation for the Alabama Tornado Relief effort). It was great fun and we made almost $130 to send to our friends in 'bama.


I did a batch of regular yellow cake from a box and then wanted a chocolate option. Also, one of my neighbor boys is allergic to eggs so I thought this recipe would be a good one so he could enjoy a cupcake too.

So, without further ado, here is the recipe (growing up we called this Mystery Cake - I guess because of the vinegar):


2 1/2 C Flour
1 1/2 C Sugar
4 1/2 T Cocoa
1 1/2 t Baking Soda
3/4 t Salt
1/2 C oil (or margarine)
1 1/2 T Vinegar
1 1/2 t Vanilla
1 1/2 C Cold Water

Mix dry ingredients then add oil, vinegar, vanilla, and water.
Bake at 350 for 18 minutes (cupcakes) or 30-35 minutes (cake rounds)

*****
For the frosting I just threw things together without measuring but my guess would be (and this was for a double batch):

1/2 C butter
1/4 C shortening
1/3-1/2 C cocoa
1 t vanilla
1 T millk
enough powdered sugar to make it the right consistency (maybe 2 C?)

Friday, April 29, 2011

Making it more SiMpLE

I've moved over the recipes, projects, tutorials, and crafts from bamamoma.blogspot.com (the original blog). They can all be found on this blog now. Eventually I will delete the other.

Tuesday, April 5, 2011

Cha-cha-cha-changes

I've lived in my house for 7 months now, can you believe it?

Obviously, that means it is time to make some changes. Here is what I've been up to:

I totally rearranged the red room so that it is more than a library. I also broke up the collage of pictures so there are a few on each wall.

I bought this awesome fabric and I'm going to recover the glider. I think I should sand down and stain the glider wood so it is darker. I'm not happy about that.

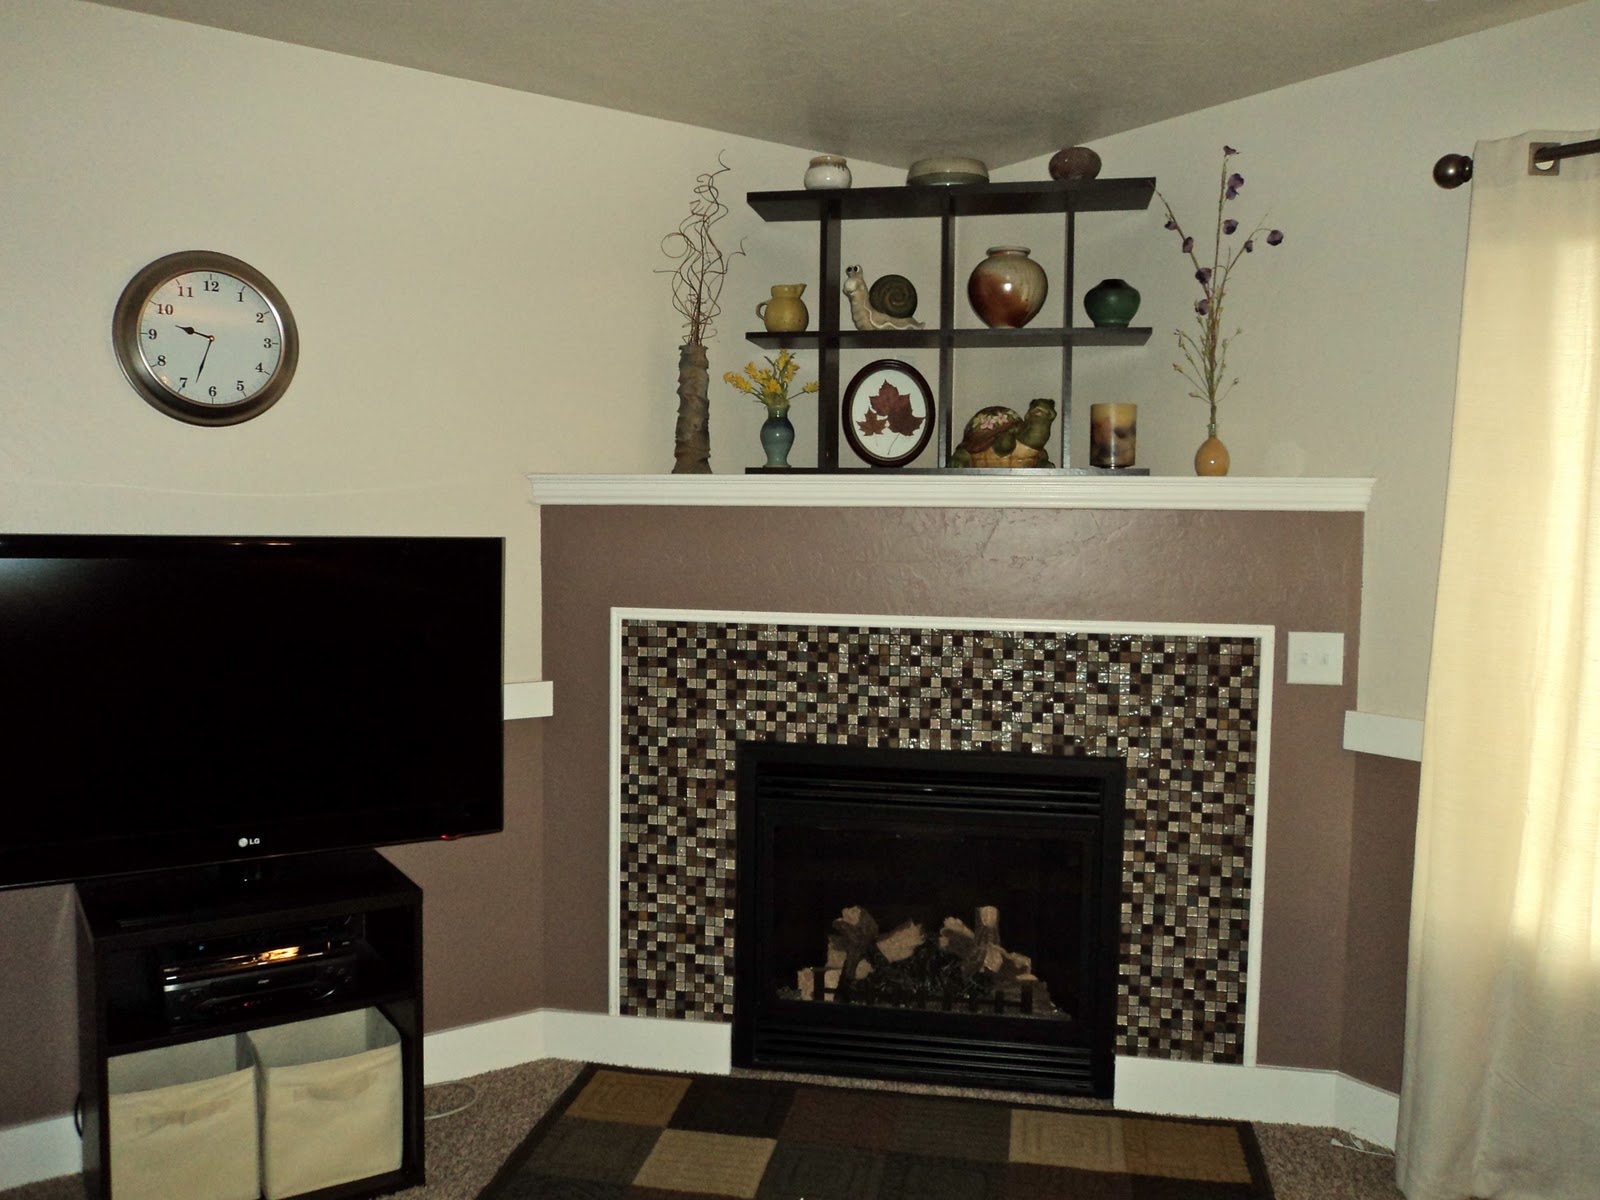
I put this shelf (we had it in 'bama) on the fireplace and I think it looks great. Eden calls that rug (also from 'bama) the "tile carpet."


The various ceramics were all made by students (both at JSU and USU). The leaf collage was a gift from Phil. My favorite place on earth is Sharon, VT. He picked up those leaves when we were there in 2001 and then gave that to me for Christmas that year.

Eden wanted to make sure I had a picture of her.


I found these two coat hook things but they were black. I took the hardware off and spay painted them. 

I put these word (faith, friends, family, fun) pictures in and then realized that these statues kind of incapsulated what they said.

This is the entrance now. Phil gave me the quotation (Ruth) for my birthday in 2009


My spring decorations (above the computer).

Friday, March 18, 2011

T is for Teeth and Transportation

This week for preschool (I was in charge again), we learned about the letter "T." On Monday we discussed Teeth and tooth care. The kids had fun. We did an experiment with eggshells (they served as our teeth) in different kinds of beverages. The Juice Drink and Soda stained the "teeth" almost immediately. The OJ actually broke down the "tooth" into pieces. Milk and water were definitely the best.  We did some other fun teeth things.

On Wednesday, we talked about transportation. We read some fun books. I had made a train out of boxes and we had fun chugging around our house. I also made two airplanes out of boxes and that was a fun thing (but we needed more space to really "fly").  We talked about shapes and they made school buses with foam stickers.


My favorite part was our snack. I made these adorable stop lights. They tasted really great too!
graham cracker, PB, and M&Ms

Monday, March 14, 2011

St Patrick's Day Treats

Here is what we (plus other family members) are having for our FHE treat tonight. Eden and I worked on these together and we're pretty happy with how they all turned out.
Shamrock cupcakes, rainbow cake, mini cupcakes as pots of gold

Monday, March 7, 2011

Fun with Reptiles

Today for our co-op preschool, I taught about the letter "R" and Reptiles. We did some fun crafts so I thought I'd share:
This cute chameleon (stolen idea from my sister Emily)
The kids had fun sticking the tongues in my ear. Thanks TANGLED for that idea!
Torn paper turtles. I was surprised that this really captured their attention and was a good motor skills developer. Who knew that tearing paper was a skill that had to be developed?
This was my favorite. These cereal snakes were a last minute idea I had (I know, an idea of my very own!).
I prepared them to this point with embroidery thread and craft foam with a sticky side. Then I put the eyes on (they could have done that). I put tape around one side and then they went to town threading the cereal (and eating the ones that weren't perfect).
When they were done, I put a triangle piece of the sticky craft foam on to make a tail and to keep the cereal in place.

Banana Cake

I'm not a purest. There, I said it. I am probably a lot more like Rachel than I am Martha. I hope this doesn't cost me any friends. Especially those friends who might happen to raise their own chickens and goats and make their own cheese.

Ok, that said (whew), I have to share with you my easy banana cake (I can't call it a recipe).

I had three over-ripe bananas. I didn't feel like really baking. I needed a dessert for FHE. I had a yellow cake mix. Knowing that bananas make things really moist, I decided that I could leave out the oil and reduce the water. I baked it. It turned out great (I know this because I made some mini cupcakes and devoured them already). Now I'm trying to decide whether to frost the cake with chocolate or PB frosting.

1 Yellow Cake Mix
3 Over-ripe Bananas
1 C Water
3 Eggs

Mix and bake according to directions on the box

Saturday, March 5, 2011

Recipe: Rustic Italian Tortellini Soup

My friend, Corrie, gave me this recipe. It is so delicious! I made it this weekend while all my family was in town for my brother's wedding. It was a hit and my sister said, "will you put that on your blog?" So, Merilee, here you go:

Rustic Italian Tortellini Soup 
Prep: 20 min
Cook: 20 min

Ingredients:
3 Italian Turkey Sausage Links (4 oz each), casings removed
1 medium onion, chopped
6 garlic cloves, minced
2 cans reduced-sodium chicken broth
13/4 C water
1 can diced tomatoes, undrained
1 pkg (9oz) cheese tortellini
6 oz fresh (of course I used my frozen) baby spinach, coarsely chopped
2 1/4 t minced fresh basil or 3/4 t dried basil
1/4 t pepper
Dash crushed red pepper flakes
Shredded Parmesan Cheese for on top

Directions:
1. Cook sausage and onion over medium heat until meat is no longer pink. Add garlic, cook and stir 2 minutes longer. Add the broth, water and tomatoes. Bring to a boil

2. Stir in tortellini; return to a boil. Reduce heat; simmer, uncovered for 5-8 minutes or until tortellini are tender, stirring occasionally. Add the spinach, basil, pepper and pepper flakes; cook 2-3 minutes longer or until spinach is wilted. Serve with cheese if desired.

Yield: 6 servings (but I think it yielded much more)
203 calores, 8 g fat, 40 mg cholesterol, 878 mg sodium, 18 g carbs, 3 g fiber, 16 g protein
Attributed to Tracy Fasnaccht from PA

Tuesday, February 8, 2011

Recipe: Stuffed Potatoes

In October 2010 I was making twice-baked potatoes and wanted to "jazz" it up a bit. They were delicious! About a month ago I was making mashed potatoes and felt the need to "jazz" them up because we weren't having gravy. I remembered the jazzy potatoes and did basically the same thing. I made them again this past Sunday and I just have to say: Y*U*M!!!!

In true jazz fashion, there aren't any exact measurements so I will try to estimate.

5-6 large potatoes (I have used both bakers and red) - cut into pieces and boiled (I leave the skins on)*
1-2 T minced garlic
1- 8oz cream cheese (or the low-fat stuff which is what I used)
milk - as needed to make the consistency you like
salt - as needed to make the flavor the way you like it
1/2 C grated cheddar cheese
1/3 C cottage cheese
1/4 C bacon bits
1/4-1/2 C spinach flakes **

Put the cream cheese into the hot/drained potato chunks and then mash (with mixer or however you normally would). Add all the other ingredients (tasting along the way to get it the way you want it). When the taste is perfect, put the potatoes into a microwavable serving dish. Next, put it into the microwave on high for five minutes. I don't know the chemistry behind this but it makes the potatoes change and get more fluffy. It also melts the cheeses into the potatoes.

Serve. (10-12 servings)

* if you want to bake your potatoes and then scoop it out and save the skins, you can prepare the potatoes as directed but rather than put them in the serving dish, scoop them back into the skins and bake for 30 minutes. Also a delicious way to do these taters.

** I buy fresh spinach, wash it, dry it, put it into freezer bags and freeze it (no blanching). Then I take the bag of frozen spinach and pound it with my fist (a great stress reliever) and it breaks into flakes. These are perfect for putting into these potatoes (and soups and a ton of other things). Don't thaw them out, just throw them straight in (otherwise you'll have a wet, gloppy spinach flake).

Sunday, February 6, 2011

Eden's Room

I haven't been happy with how E's room looks. She wanted pink, pink, pink, and stars but I just could figure out how to pull it all together. Having a queen sized bed in her room looked cramped and it seemed her bookshelves always look messy and old (well, they ARE old, I had them before Phil and I got married).

I decided it was time for a makeover. I moved her bed under the window. Then I covered the bookshelves with craft paper (clearance no less!) and for $3 I had two new bookshelves. I found an adorable night light (flower) at IKEA and convinced Eden to let me change the stars out for flowers (although we still have a few stars around the room). It looks so much better, more orderly, and definitely more roomy.

Take a look:


Monday, January 31, 2011

Valentine Tree

I saw some cute trees with heart leaves and I thought they were so fun and easy. Then I thought it would be fun to put a heart owl in the tree. This is what I came up with:


Here are the steps:
Cut out a tree shape
Cut out some hearts for leaves
One heart for the wings, a slightly smaller one for the body, two small hearts for the feet, and a tiny heart for the beak
Assemble the owl. You can use googly eyes or whatever for the eyes
Assemble the tree, leaves, and owl. This is a small card for Eden (she told me it was for her)

Sunday, January 30, 2011

Personalized Job Chart

I've decided it is time to have a job chart. Eden can't read yet so I wanted to use images. After spending a few minutes looking for cute, free clip art for each of her jobs, I decided I was done with that. Then it occurred to me, I have a camera! Duh! So, I had Eden pose for each of her jobs (which reinforced what her jobs are) and then printed them on photo paper, laminated them, cut them out, put magnets on them, and voila!

There are three rows: Morning jobs, Night-time jobs, and eXtra jobs. She has to do the morning and night-time jobs just because but she gets an allowance for the eXtra jobs. The eXtra jobs include things like setting the table, washing windows, dusting, emptying the dishwasher, straightening her books and toys.

Here is a picture of the job chart today:

Thursday, January 27, 2011

More V'day Decor

These are just letters from Hobby Lobby and I covered them in craft paper (using spay-on glue). They are actually now on the inside of my front door in vertical fashion (I used painters tape to adhere them).

I found this frame at the HobLob and thought it was so appropriate. I happened to have a black and white print of one of our engagement pictures so I threw that in. I really like this decoration.

Sunday, January 9, 2011

Heart Bouquet

As I took down the Christmas stuff, I wanted something to put in its place. The stores have moved on to Valentine's Day, why shouldn't I? I didn't want to spend a bunch of money though so I'm making most of my v'day decor.

I have this cool white vase/pot and decided it would look so cute with a bouquet of hearts coming out of it. So, I bought some florist wire (pre-wrapped) and foam and used some of my cute craft paper and went to work.

Here is a picture of it in progress. It was so simple. Just throw the wires into the florist foam, curl them down to the size I wanted them, cut two paper hearts the same size, glue them together around the wire, and boom, there it is.

Monday, January 3, 2011

PBWC

I have discovered the magic that is peanut butter + white chocolate. The funny thing is that I don't really like either on their own, but put them together and it really is magical!

Here are a couple of my PBWC creations:

PB Popcorn

  1. Pop (preferably air pop) some corn (enough to fill a large bowl - approx. 1/2 C kernals).
  2. Shake some salt on the popcorn.
  3. Melt 1/2 bag of white chocolate with 1/4-1/3 C PB (just toss them together in the microwave for 30 second increments, stir, repeat, until fully melted - don't over-cook).
  4. Pour PBWC over the popcorn and toss until all the corn is well covered.
  5. Dump it onto a sprayed tray/cookie sheet.
  6. Put in a cool place (my garage works great).
  7. When the PBWC has set, put into bowls or bags or directly into your mouth.

PB Brownies
  1. Make your favorite brownies. (Phil's Brownies work great!)
  2. Melt 1/2 bag of white chocolate with 1/4-1/3 C PB (just toss them together in the microwave for 30 second increments, stir, repeat, until fully melted - don't over-cook).
  3. Pour the PBWC on top of the brownies.
  4. Put in a cool place (my garage works great).
  5. When everything is cool, cut, serve, eat.


Monday, November 8, 2010

Recipe: Pumpkin Pancakes

 Today we had this for breakfast:

It was so yummy!

Over the weekend some friends were here and they made pumpkin cinnamon rolls (recipe here) and so there was some leftover pumpkin. I thought pumpkin pancakes with caramel syrup sounded just too good so I adjusted my regular pancake recipe and came up with this:

Heidi's Pumpkin Pancakes

In a medium mixing bowl combine:
2/3 C All Purpose Flour
1/3 C Wheat Flour
2 T Sugar
1 t (heaping) Baking Powder
1/2 t Salt
a Dash of Cinnamon
a Dash of Ginger
a Dash of Nutmeg
Mix and then add:
1 egg
1/3 C Pumpkin Puree
1/3 C Buttermilk
1/2 C Water
Mix just until a thick batter is formed (add more water if needed), don't over-mix.
Cook as you would a regular pancake (for us that means on a griddle at 350 degrees). These take a little longer to cook through but they are worth the wait.

Makes enough for 4 average people (probably 2 hungry people).

Caramel Syrup

In large pan combine:
1/2 C butter
1 1/2 C sugar
3/4 C buttermilk
1 t baking soda
1 t vanilla
2 T Karo syrup

Mix and bring to a boil. Boil for 5 minutes.

Wednesday, October 27, 2010

Rocking Reading Corner

I wasn't sure what to do with the space behind my couch. It seemed like wasted space until I brought the rocking chair downstairs during conference because Eden was sick and wanted me to hold her while I watched conference on our computer. I moved some stuff around and this reading corner was born.

 The lamp table was raw wood from IKEA. I "stained" it using watered down paint (the same as the wall paint). The top is made from the same glass tiles as the fireplace.

If you look closely on that back wall (above the bookcase) you'll see a self-portrait Phil did. It is Voice Male Phil. I'm pretty sure it is Mikey B behind him.

Here you can see how it relates to the rest of the room.
Posted by Picasa