Monday, October 24, 2011

Spudnuts

Every Halloween, my mom makes a bunch of doughnuts and all her neighbors flock to her house. She has candy for the kids (silly kids, choosing candy over spudnuts!) but the adults get a warm doughnut. I made them this past weekend and thought I'd share the recipe.

This makes over 100 doughnuts but you can half or even quarter it.

Ingredients

  • 4 1/2 C Water
  • 1 1/2 t Salt
  • 1 C Margarine (or butter)
  • 5 Eggs (if halfing, my mom suggests using 3 eggs)
  • 1 C Sugar
  • 2 C Mashed Potatoes (left overs are fine as long as you didn't add garlic or ranch to them)
  • 2 t Nutmeg
  • 14 C Flour
Instructions
  1. In small bowl, mix 1/2 C water, 2 T yeast, and 1 t sugar. Let brew.
  2. In large bowl (as in HUGE) mix 4 C water, salt, margarine, eggs, sugar, mashed potatoes, nutmeg.
  3. Add yeast mixture and mix with a wire wisp. Add flour and mix with a wooden spoon until all flour is moist.
  4. Let rise in bowl until double (approx. 1 1/2 hours)
  5. Roll our and cut into doughnuts or bars and let rise again until double (approx. 1 1/2 hours)
  6. Deep fry in very hot oil. Place the side that was up while rising in the oil first, then turn..
  7. Glaze, eat!
Glaze Recipe
  1. Mix 4 C powdered sugar with enough milk to make a glaze (not frosting), mix with a wire wisp.
Plan on starting these about 4-5 hours before you want to eat them. While they are time intensive, most of that time is rising so you aren't actually working on them.

We made ours pumpkin shaped. They didn't keep their shape too well in the rising/frying process.
Deep frying - be careful!
We added orange food dye to our glaze since we made "pumpkins"
These were yummy. We're glad we had the Voice Male gang here to help us eat them!

Wednesday, October 5, 2011

H is for Halloween (of course!)

Today in preschool we worked on the letter H. Whereas Monday was a science day, today was definitely an arts and crafts day.

We painted sugar cookie pumpkins. (Recipes below)

We read this book and each child got a set of 10 Timid Ghosts

We read this story and then they drew something from the story. Left to right: The mailman, Marley, the pumpkin. Not bad for 4 year olds!

We made foot print ghosts. They didn't turn out as well as I'd hoped (their arches were too high, I guess). Next time I think I'll use the bottom of a flip flop to stamp out the ghost shape (heel is the head).


We talked about shapes and then they got to design their own Jack-o-lanterns.

See how cute!


We sewed these hand puppets. This one is a witch in the making.

This one is a kitty. (These were from a kit I bought at the HobLob.)

Maybe my favorite project is one we didn't even get to. So, Eden and I did them after preschool. These are inkblot monsters. We painted one side, folded it over, rubbed it, opened it up, then put on eyes, etc. Aren't these hilarious? We have about five more that Eden did this afternoon. Truly fun and funny.


I love teaching preschool once a month. I get so excited to prepare for the week I get to teach, but let me tell you, I'm also so excited when my week is done and I know I won't be teaching again for a month! This is definitely a nice set up we have, it suits me just perfectly.

Recipe for sugar cookies found here.
The glaze is just powdered sugar and milk to a paint-like consistency then add your food coloring. Using the paint brushes is ingenious and so fun. Every fall when we do these I think of my friend Natalie back in Alabama. She is the painted sugar cookie queen.

Tuesday, October 4, 2011

G is for Glass and that rhymes with Grass

Yesterday for preschool we talked about the letter G. I wanted the focus to be on science and so we did some chemistry and biology. Specifically, we learned about how Glass is made and we learned about Grass.

Glass
I showed them this video:


I wondered if they'd be able to follow it but with some running commentary/explanation by me they were and seemed to think it was fascinating!

Then we made glass for ourselves (with a few substitutions).

Sand - Sugar
Soda Ash - Water (lowers the melting temperature)
Lime - Corn Syrup (stabilizes and makes less soluble)
2400 degrees - 350 degrees
8 hours - 20 minutes

Yup, we made suckers. It was a great parallel to glass making and the kids watched with great interest and enthusiasm.


See how it balls up just like the real glass?


They each got to take home a "glass" sucker and they were pretty excited.

Yesterday was our last day of summer weather (I know, we've been spoiled) so I wanted to get the kids outside as much as possible before today's fall-like rain began. So, we also learned about Grass.

We planted and watered grass seeds and talked about the life cycle of grass. I had a puzzle for each of them to correctly assemble the life cycle from seed to grass blades. 
We went outside and used our magnifying glass to look at the grass and all that was in it: bugs, dirt, etc. Then they drew pictures in their notebooks.

Tuesday, September 27, 2011

Autumn Time

Eden has been begging me to get out the fall decorations. I finally acquiesced.
Eden's Scarecrow

Eden's Witch

I made this last night. I have to say, I love it! Comparable wreaths at the HobLob were between $80-120. I made this for less than $20. It took about two hours. The first hour was just cutting the leaves and flowers off their stems. The second hour was hot gluing. I think it looks so pretty on my green door.

Dollar Store lanterns.

This guy was on the outside of our door last year but he kept getting blown away so he gets to stay inside this year.

Eden's decorations from last year.

The mantel. This year we have some dragonfly lights. We like dragonflies, they remind us of Phil.

Piano 

I made these pumpkins two years ago (in AL) out of old Phil shirts (even the leaves). We like them.

More art by Eden.

Eden made these creepy critters on Sunday.

Tuesday, September 20, 2011

Thin Crust Pizza Dough

This is a knock-off of the California Pizza Kitchen recipe (with a few of my alterations, of course).

It is THE pizza dough for margarita pizza (still addicted, so yum!).

Yield: enough dough for one large pizza.
Time: prep time is about 20 minutes but total time is 3 hours(ish).

Ingredients

  • 1 t active dry yeast
  • 1 C warm water (less if you live somewhere other than a desert)
  • 1 C all-purpose flour
  • 3/4 C wheat flour (my addition)
  • 1 t sugar
  • 1 t salt
  • 2 t olive oil
Directions
  1. Brew yeast in the warm water (not too warm or it will kill your yeast) until it is bubbly and frothy. I have it in my brain that yeast brews better in glass but I don't know if that is really the case. 
  2. In your stand mixer (e.g. KitchenAid), add the flours, sugar, salt, and olive oil. Use a slotted wooden spoon to mix this all together.
  3. Slowly add your yeast mixture while the mixer is on low (you can use either the bread hook or paddle attachments).
  4. Once the dry is no longer dry, turn your mixer to medium and mix for 1-2 minutes. If you mix too long, it will cause too much glutton and your dough will be too elastic to spread out on your pizza pan.
  5. Remove your dough-ball from the bowl and spray the bowl with oil. Replace the dough, cover with either plastic wrap or a wet rag.
  6. Let your dough rise for approximately 2-3 hours.
  7. Punch the dough down, form into a ball and then use a pastry roller to shape onto your pizza pan/stone. You want this thin. It will cook into a nice, crunchy thin crust.
  8. Top and bake as directed with your pizza recipe. If you don't really have a recipe and you are just putting toppings on and want to cook it, try 450-475 for 10-12 minutes.
(note: although this is a thin crust recipe, it works fine as a thicker crust too so you could do a medium thick crust with these same instructions.)

ENJOY!

Monday, September 12, 2011

A is for Africa

Today we started our Mommy-n-Me preschool again. I get to teach this week and it was so fun to prepare. I had the letter "A" today and chose to teach about Africa.

We looked at lots of pictures of African children and discussed diversity. We looked at a book of African animals and another about African folk art. We had some really fun learning projects. Here are some pictures:

This is one of the African drums. It is made with two disposable cups glued base to base. Masking tape is used for the "animal skins" at the tops. Mod podge and tissue paper were applied (ahead of time) and then the kids painted them and added the beads.
"Cave drawings" (using sandpaper)


a pyramid made from the letter "A"

They cut the bananas, dipped them in the egg wash and bread crumbs,  and then watched me fry and bake them. Then they ate them. We got to discuss kitchen sanitation and safety as well as learning to cut (bananas are great for this because they cut easily with a table knife).

Safari animal memory game (color, cut out and play!)

Thursday, September 1, 2011

What's for Dinner - Margarita Pizza


Really Simple Margarita Pizza

  • 1 Thin Bagle
  • 1/2 t Olive Oil 
  • 1 small Roma Tomato (sliced)
  • 4-6 sprigs of fresh Basil
  • 2 slices of Fresh Mozzarella (get the good kind that is still moist - it is totally worth it!)
  • some thinly sliced Purple Onion
  • Salt and Pepper


  1. Preheat oven to 450
  2. Sprinkle the Olive Oil on the Bagle slices (one top, one bottom).
  3. Arrange the Tomato, Basil, Mozzarella, and Onion on top.
  4. Shake some salt and pepper on top.
  5. Place pizzas in the preheated oven for approximately 10 minutes.


Prep Time: 10 minutes
Cook Time: 10 minutes
Total Time: 20 minutes
Calories:  273
Carbs: 30
Fat: 15
Protein: 15

Wednesday, July 6, 2011

Baby Boom

It seems there is a baby boom going on! There are so many neighbors and relatives that are preggers right now. Amazing and awesome.

In another life (aka: when I was single) I used to make baby afghans for all my nieces and nephews and friends' kids. Then I became a mother and that ended.

I've interrupted the hiatus with a few baby afghans. I make no predictions as to whether this will continue. For now it has been pretty fun (except when I am under the gun to get one done).

here are a couple I've done recently:
This one was given to my cousin-in-law and neighbor. The pic doesn't really show how creamy and peachy it is. 

This one will be given to my SIL Morgann. She told me she likes pink with gray and this is what I came up with. I'm pleased with how it turned out because I didn't have a clear vision (do I ever?) when I started. This one evolved well, I thought.

A close up of the sunburst squares in the middle.

Of course Eden had to get in the picture!

Tuesday, June 21, 2011

Numbers and Movement


Eden has struggled a bit with counting beyond eleven. She has also struggled to recognize double digit numbers. We have flash cards and have tried a variety of ways to make it interesting. Today we found one that seems to have been both fun and effective.

I made a chart of physical activities for each number 1-20. For example:
1 - Split
2 - Somersaults
3 - Push Ups

etc.

I then held the flash cards number-side down and she randomly chose one. Then we both did that exercise for that number of repitions. It was great because she had to count with each exercise (obviously 1 split or 2 somersaults didn't require great counting but a 20 second plank required counting all the way up to 20!).

We had lots of fun and her counting and number recognition seemed to improve during the activity. I think it is definitely something we can repeat and when it gets too routine, I can mix it up with new exercises.

It was also good because Eden was not blessed with the most coordinated genes (but man can she perform!). It was good for her to use her body in ways that she hasn't tried before. She complained that her abs hurt (she didn't know they are called abs but she showed me where her stomach muscles hurt).

All in all this was a great activity and we'll be doing it again.

Thursday, May 26, 2011

Freezer Jam

This is not an advertisement for Ball caning products, but it could be.

I love making freezer jam. I love the plastic 8 oz containers with the screw tops that Ball makes. I love that they are the perfect size. I love that the bottom clicks into the top of the lid so that they stack perfectly. I love that they are easy to wash and reuse (I use them for all kinds of things after the jam is gone).

I prefer jam made with Sure-Jell pectin rather than Ball instant pectin. It tastes better. And why wouldn't it? It has TONS more sugar. So, because it uses less sugar and because it doesn't require any preparation (you just dump the powdered pectin in with your sugar), I use Ball pectin. It also works with Splenda which is a nice alternative for diabetics. I love that I can make 5-8oz containers of jam in about 20 minutes. How easy is that?

Last fall I bought some fresh/frozen blackberries from Oregon (they are actually from a farm on the same road that my high school and church are on). I put the berries in freezer bags and tonight it was so easy to pull out one of those bags (I'd already defrosted it in the fridge) and just moosh the berries right in the bag, pour them into my measuring cup and then add them to the sugar/pectin mixture, stir for 3 minutes, then ladle them into my handy containers, let them sit 30 minutes and pop them into the freezer.

It REALLY is that easy! The taste of fresh berries* to last throughout the year!
*I like my jam to be fairly chunky, with pieces of berry in it. If you want a smoother texture, you'll have to work a little harder at mixing and straining. Raspberries are so seedy that I usually strain half and leave half chunky so that when mixed I get my desired chunkiness without all those seeds. Strawberries are less juicy and so they require a little more mooshing. I like to use my blender for strawberries and then I lightly chop a few so that I get the chunky-factor. I've never done fruit jams (just berry ones) but this summer I'm going to experiment. I'll keep you posted.

Monday, May 16, 2011

Awesome Pizza Dough Recipe

I found a recipe online and then tweaked it a bit (of course). The original is Jay's Signature Pizza Crust on allrecipes.com.

The crust turned out really great. It had a really light texture, was crunchy on the outside and soft on the inside. The flavor was great too. It is fairly easy to make (you do need to plan on starting your dough about 2 hours before you plan to eat though).
Here is a piece of our pizza from last night. See how yummy that crust looks!
Ingredients: (for two large pizzas or three medium pizzas)
  • 1 T active dry yeast
  • 1 t brown sugar (or honey)
  • 3 C warm water
  • 2 t salt
  • 1/4 C olive oil
  • 5 C all-purpose flour
  • 1 1/2 C wheat flour


Directions:

  1. In a large bowl (or your Kitchen Aid bowl), dissolve the yeast and sugar in the water. Let sit 10 minutes (be patient and let it sit).
  2. Add the salt and oil and mix.
  3. Add half the white four and all of the wheat flour. Mix.
  4. Knead in the remaining flour until the dough is no longer sticky and has a nice smooth texture.
  5. Place the dough in a well oiled bowl (let's be honest, I just lifted the dough, sprayed my already-used bowl with olive oil spray and then plunked the dough back into it, I then sprayed the top of my dough with a little of the olive oil spray).
  6. Cover and let rise until double (approximately 1 hour).
  7. Punch down dough and form into balls (3 for 3 pizzas, etc.). Let it relax a bit before you start to spread it.
  8. Form into the shape of your pizza pan. Because the dough is quite rubbery, I found a small (like fits in my hand) roller to be essential. Before Phil bought me said roller, I would use a small glass and that worked as well.
  9. Preheat your oven to 425 and then top your pizza with your favorite toppings.
  10. Bake until the cheese and crust are golden brown (about 15-20 minutes).

Monday, May 2, 2011

Chocolate Cake (no eggs)

Today we made cupcakes and then gave them away (while asking for a donation for the Alabama Tornado Relief effort). It was great fun and we made almost $130 to send to our friends in 'bama.


I did a batch of regular yellow cake from a box and then wanted a chocolate option. Also, one of my neighbor boys is allergic to eggs so I thought this recipe would be a good one so he could enjoy a cupcake too.

So, without further ado, here is the recipe (growing up we called this Mystery Cake - I guess because of the vinegar):


2 1/2 C Flour
1 1/2 C Sugar
4 1/2 T Cocoa
1 1/2 t Baking Soda
3/4 t Salt
1/2 C oil (or margarine)
1 1/2 T Vinegar
1 1/2 t Vanilla
1 1/2 C Cold Water

Mix dry ingredients then add oil, vinegar, vanilla, and water.
Bake at 350 for 18 minutes (cupcakes) or 30-35 minutes (cake rounds)

*****
For the frosting I just threw things together without measuring but my guess would be (and this was for a double batch):

1/2 C butter
1/4 C shortening
1/3-1/2 C cocoa
1 t vanilla
1 T millk
enough powdered sugar to make it the right consistency (maybe 2 C?)

Friday, April 29, 2011

Making it more SiMpLE

I've moved over the recipes, projects, tutorials, and crafts from bamamoma.blogspot.com (the original blog). They can all be found on this blog now. Eventually I will delete the other.

Tuesday, April 5, 2011

Cha-cha-cha-changes

I've lived in my house for 7 months now, can you believe it?

Obviously, that means it is time to make some changes. Here is what I've been up to:

I totally rearranged the red room so that it is more than a library. I also broke up the collage of pictures so there are a few on each wall.

I bought this awesome fabric and I'm going to recover the glider. I think I should sand down and stain the glider wood so it is darker. I'm not happy about that.

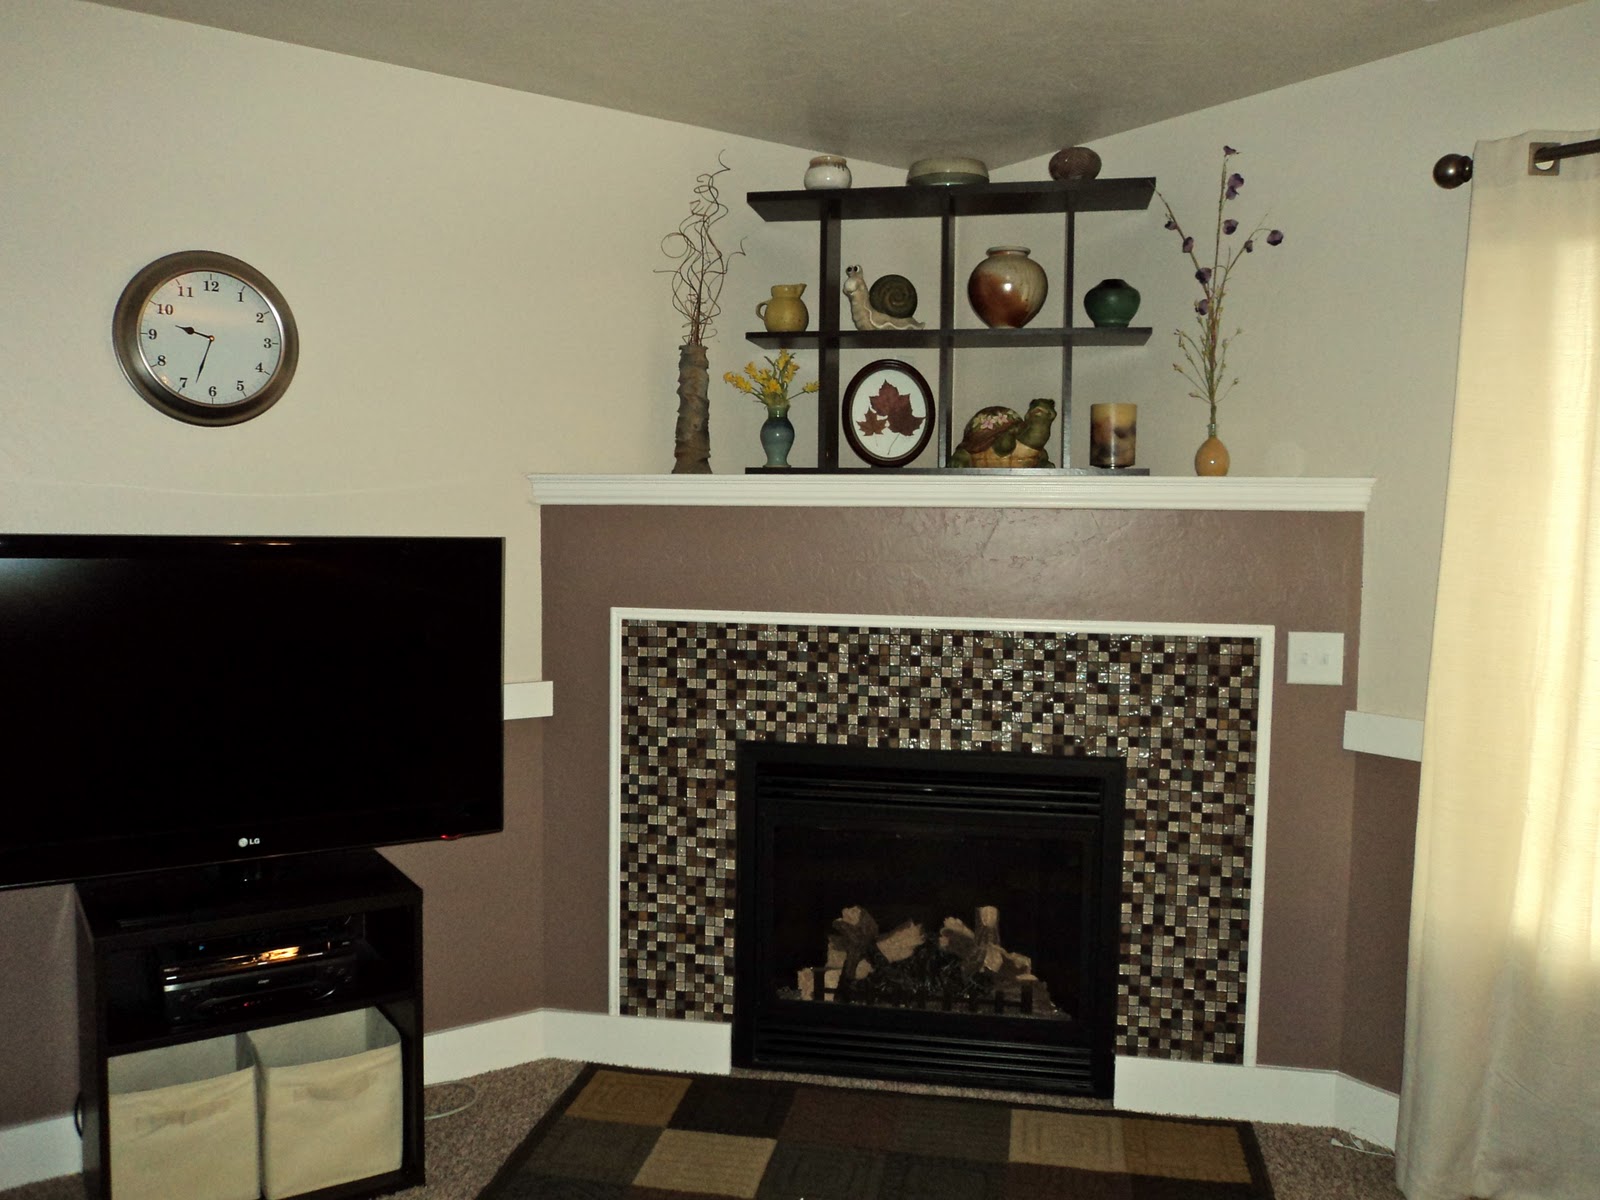
I put this shelf (we had it in 'bama) on the fireplace and I think it looks great. Eden calls that rug (also from 'bama) the "tile carpet."


The various ceramics were all made by students (both at JSU and USU). The leaf collage was a gift from Phil. My favorite place on earth is Sharon, VT. He picked up those leaves when we were there in 2001 and then gave that to me for Christmas that year.

Eden wanted to make sure I had a picture of her.


I found these two coat hook things but they were black. I took the hardware off and spay painted them. 

I put these word (faith, friends, family, fun) pictures in and then realized that these statues kind of incapsulated what they said.

This is the entrance now. Phil gave me the quotation (Ruth) for my birthday in 2009


My spring decorations (above the computer).