Monday, November 28, 2011

Project: Earring Holder/Display (for $3)

I've been needing a way to organize my earrings. I had seen plenty of examples of cute ways to display and organize fun earrings and I wanted to do something similar.

This is what I ended up doing:

I bought an unfinished picture box frame from the HobLob at 50% off making it $2.50. I removed the glass and distressed it a little. Then I stained it with some stain I already had.

After the stain dried, I used some of this netting and covered the picture box two or three times. I just used hot glue and made sure it was nice and tight. Then I put the frame part on with the fasteners it came with and voila!

It was fun placing all my dangling earrings in this. It is so much easier to find what I want to wear now. I'm quite happy with it!

Sunday, November 27, 2011

Magnetic Nativity Project - Easy and Fun

I wanted a nativity that Eden could play with and that would be durable, portable, and easy. This is what I came up with:

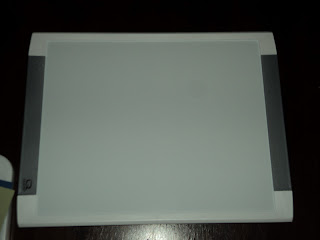
I bought this small (probably 6"x8") whiteboard for under $3:

Then, using craft paper I already had I made the background (blue sky, green hills, sandy ground):

I just used double stick tape to put it onto the whiteboard:

Again, using craft paper I already had, I made this simple stable. You could simplify it even more by leaving off the rafters:

Next I printed off these images. They can be found here. Then I covered the images with contact paper and cut them out:

I covered the stable/background with contact paper and placed magnetic tape (that I already had) on the back of the nativity images:

My total cost for this project (excluding items I already had) was less than $3. If I had purchased the magnetic tape and craft paper it still would have come in under $5. I have given some of these as gifts (and plan to do some more). Eden took hers to church last week and it was a great quiet Christ-centered activity for her to do during the talks.

Monday, November 14, 2011

Mind your "Ps" and "Qs"

It was my turn to teach preschool again and this time we had "P" and "Q."

For the letter "P" we mostly talked about painting. I showed them some of Phil's art books and we discussed the difference between various styles and mediums (without any technical language). Not surprisingly, they all liked the more realistic paintings and water colors the best.

Next, I set up four stations (because we have four kids in our preschool). Each child got to spend time at each station. The stations were:

  1. Painting with brushes and a large piece of paper.
  2. Finger painting.
  3. Traditional water paints.
  4. Water paint pencils.
The kids had lots of fun and they were mostly clean at the end.

We also talked a little about pennies and I had them count pennies and then we used flash cards to pick a number and they counted out that number of pennies.

After the other kids went home, Eden continued to paint. She loved the water colors and started to really do some interesting things. She spent much time over the next several days painting. Phil would be so proud.

For the letter "Q" we did the following:
  • We told a story about how "Q" always wanted a best friend and then when he met "U" he realized he'd found one and decided that they would always stick together. The children took turns re-telling the story and then they took turns being "Q" and "U" and following each other around the room.
  • We made crustless Quiche. (3 eggs, 1/3 C Ricotta Cheese, 1/3 C Shredded Colby, 1/3 C Milk; blend in blender; pour into ramekins; bake at 400 degrees for 15 minutes). The kids each got to choose what extras (bacon bits, spinach, etc.) to add to their quiche. When they were done, we ate them and Nestle Quick for snack.

  • We made Quilts. We used sticky-backed craft foam of various shapes and each child got to design their own quilt. I was surprised at how much they enjoyed this activity. Even the boys really got into it.

  • We sorted coins in order to find the Quarters. Then we did various counting and number games using the quarters.

Tuesday, November 8, 2011

Monday, November 7, 2011

Thanks-giving FHE

Yesterday we had a great lesson in RS about the importance of gratitude. I've been seeing all the November-is-grateful-month posts on FB but haven't felt inclined to join in. The lesson, though, reminded me that it is never a bad time to get on the grateful bandwagon. So, for FHE tonight, I brought back one of our favorite November rituals. Phil and I started this three years ago. It has taken slightly different forms but has kept its original intent and purpose.

Behold the Thanks-giving Turkey:


Every night from tonight until Thanksgiving we will add a feather of gratitude to this little Turkey. He looks pretty bare right now, but just you wait!

Eden and I talked about the importance of gratitude. I asked her why it is good to say "thank you" and she said, "because then you'll probably get more stuff!" Clearly, I have some work to do.

Yesterday in the RS lesson there was a quote that said, "What if you woke up today with only the things you thanked Heavenly Father for yesterday?" I used that concept and said to Eden, "what if I took back everything except the things you have thanked me for?" She replied, "I'd be really, really mad." We talked about it and then I said, "what if Heavenly Father took back everything except what we thanked him for yesterday? Did you thank Him for our house? Did you thank Him for your mom?" etc. She realized she would have food and that is about it, no house or mom or toys or friends. I think her prayer tonight was the first time she's ever thanked Him for her mommy. Nice!

She is so excited to add feathers to our bare little bird. I told her that she needs to be thinking through out the day so that she'll know what to put on the feather each night.

I'm thankful for a great lesson yesterday and the inspiration to bring back the Thanks-giving Turkey.

To make the turkey I bought a piece of foam-core at the dollar store. I used brown wrapping paper to cut out the body (just a basic pear-like shape). I cut a triangle beak and red for that floppy thing (Layne can tell us in the comments what that is called). His eyes are just white paper and blue paper with accents from a black marker. His legs are from scraps of orange paper. I cut out feathers from a variety of colors. It is all pretty basic but makes a cute bird in my humble opinion. In past years we have done individual birds (that were smaller) and the first year we used a pumpkin for the body and I just cut out a head and feathers that we pinned onto it. The problem is that the pumpkin didn't quite make it to Thanksgiving.


Glossary: 
FHE - Family Home Evening, a family night held once a week (usually on Mondays) in Latter-day Saint homes. Ours follows this basic pattern: song, prayer, flag salute, "Kesler Kudos" (a time to thank one another), lesson (brief), activity, treats, prayer.


RS - Relief Society, the women's organization within the Church of Jesus Christ of Latter-day Saints. It is the largest women's organization in the world.


FB - Facebook (but I'm guessing you already knew that!) :)