Showing posts with label home decorating. Show all posts

Thursday, December 8, 2011

Christmas Calendar (under $10)

I bought this shelf at Deseret Industries for $3. It was green, falling apart, had some bad repairs made to it, and was just ugly. Somehow I saw potential (but not enough confidence to have taken a before picture). I really love how this turned out. I spent $6 on the wood rectangles for the numbers but everything else I already had. I really love the subway tiles (stickers) on the sides. This is a project that actually turned out better than envisioned. I thought I'd buy number stickers but I couldn't find any that I liked and then I realized that I own a colored printer (duh!) and I could choose my own typeface and colors. I love how they turned out. I embellished with Christmas stickers I'd bought earlier and voila!


Tuesday, April 5, 2011

Cha-cha-cha-changes

I've lived in my house for 7 months now, can you believe it?

Obviously, that means it is time to make some changes. Here is what I've been up to:

I totally rearranged the red room so that it is more than a library. I also broke up the collage of pictures so there are a few on each wall.

I bought this awesome fabric and I'm going to recover the glider. I think I should sand down and stain the glider wood so it is darker. I'm not happy about that.

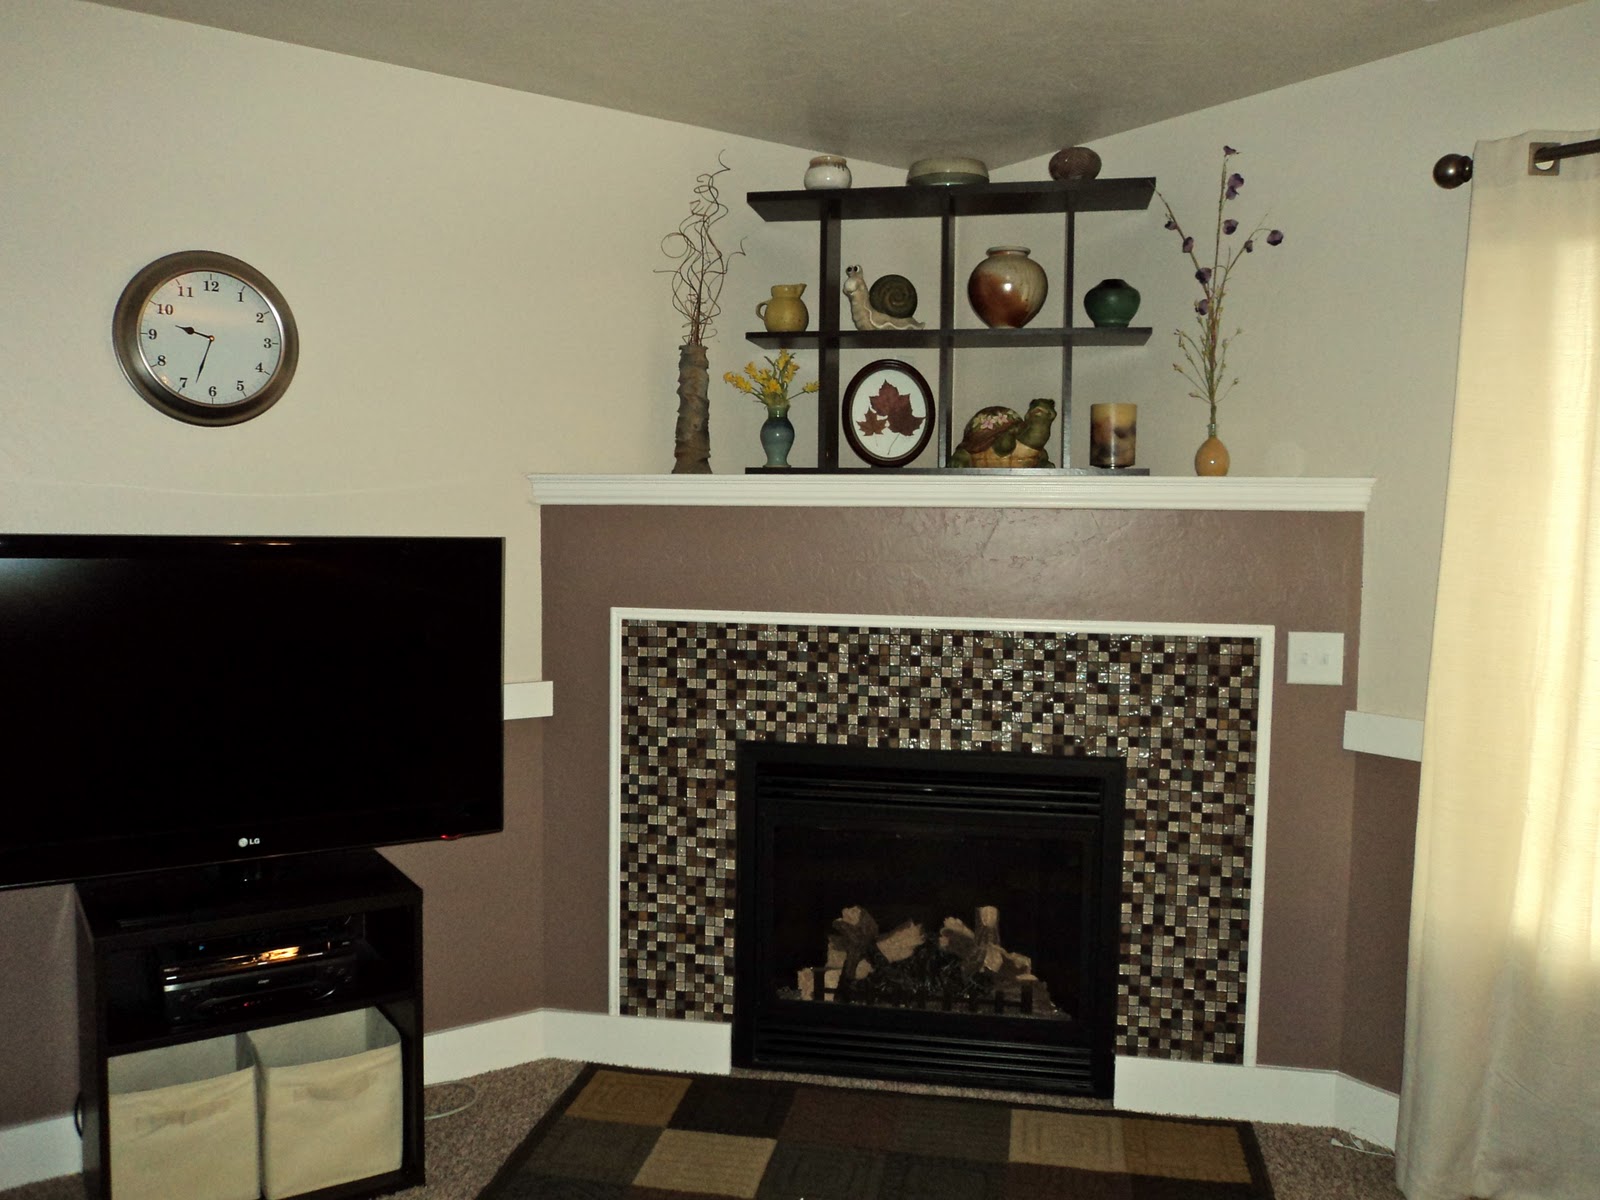
I put this shelf (we had it in 'bama) on the fireplace and I think it looks great. Eden calls that rug (also from 'bama) the "tile carpet."


The various ceramics were all made by students (both at JSU and USU). The leaf collage was a gift from Phil. My favorite place on earth is Sharon, VT. He picked up those leaves when we were there in 2001 and then gave that to me for Christmas that year.

Eden wanted to make sure I had a picture of her.


I found these two coat hook things but they were black. I took the hardware off and spay painted them. 

I put these word (faith, friends, family, fun) pictures in and then realized that these statues kind of incapsulated what they said.

This is the entrance now. Phil gave me the quotation (Ruth) for my birthday in 2009


My spring decorations (above the computer).

Monday, January 31, 2011

Valentine Tree

I saw some cute trees with heart leaves and I thought they were so fun and easy. Then I thought it would be fun to put a heart owl in the tree. This is what I came up with:


Here are the steps:
Cut out a tree shape
Cut out some hearts for leaves
One heart for the wings, a slightly smaller one for the body, two small hearts for the feet, and a tiny heart for the beak
Assemble the owl. You can use googly eyes or whatever for the eyes
Assemble the tree, leaves, and owl. This is a small card for Eden (she told me it was for her)

Thursday, January 27, 2011

More V'day Decor

These are just letters from Hobby Lobby and I covered them in craft paper (using spay-on glue). They are actually now on the inside of my front door in vertical fashion (I used painters tape to adhere them).

I found this frame at the HobLob and thought it was so appropriate. I happened to have a black and white print of one of our engagement pictures so I threw that in. I really like this decoration.

Sunday, January 9, 2011

Heart Bouquet

As I took down the Christmas stuff, I wanted something to put in its place. The stores have moved on to Valentine's Day, why shouldn't I? I didn't want to spend a bunch of money though so I'm making most of my v'day decor.

I have this cool white vase/pot and decided it would look so cute with a bouquet of hearts coming out of it. So, I bought some florist wire (pre-wrapped) and foam and used some of my cute craft paper and went to work.

Here is a picture of it in progress. It was so simple. Just throw the wires into the florist foam, curl them down to the size I wanted them, cut two paper hearts the same size, glue them together around the wire, and boom, there it is.

Tuesday, July 21, 2009

Tutorial Tuesday - Personalized Artwork

I had just painted our master bedroom and bath and wanted some art for the bathroom wall. I decided to make some original art and give it to Phil for Father's Day. Here is what we came up with:
1. I bought three Artist Canvases (one for me, one for my daughter and one for Phil):
2. I also bought some basic craft paint in colors that would work well in my bathroom. I bought a combo pack of craft paint brushes.

3. I put the canvas out for my two-year old daughter and then gave her one paint color and all the brushes and watched her go to town. I let it dry.

4. I put the canvas (with one dry color of paint already done) out another day and let her have fun again. I let it dry.

5. Repeat, for the third color. By allowing it to dry I prevented the colors from becoming one yucky mess of gray. You can see the distinct colors. You can do this as many times as you'd like - layering the colors on top of each other until your child has the look they want.
6. For my "artwork" I wanted something geometric. I used a straight edge to get the basic shapes and used round stenciling brushes for the circles. I then printed out my letter "K" from the computer and cut it out then traced around it right on the canvas. I filled it in with the paint. It certainly isn't perfect but I like it.

7. Don't forget to "sign" your artwork.
8. I bought some ribbon to decorate the edges. You can use hot glue or whatever to adhere the ribbon to the canvas edge (I just used double stick tape).
Voila! (Phil hasn't done his yet so we haven't hung them - but he really liked this Father's day gift from his two artistic proteges).

Tuesday, June 23, 2009

Tutorial Tuesday - Picture Tile Wall Hangings

Do you want to make some adorable picture hangings like these?
Let's get started then!

Materials:
  • Photos (or other pictures)
  • Straight Edge (metal ruler)
  • Utility Knife
  • First Aid kit (keep it on hand for when you slice your finger using the utility knife)
  • Vinyl Tile Scrap (you can usually purchase these at Lowe's or Home Depot)
  • Ribbon
  • D Rings (you can get these at any sewing or craft center - like Hobby Lobby or Michaels)
  • Adhesive (tape, glue gun, or whatever your adhesive of choice is)
  • Pencil
  • Sewing Machine, Thread, Scissors (or not, if you have another way to fuse two sides of ribbon together)
  • (optional) Hair Dryer
Instructions:
1. Choose what kind of pictures you want and then take some photos (or cut out pictures from a magazine or whatever)


2. Measure your tile slightly smaller than your picture (like 1cm smaller on each side) and then cut it.
2a. Using your pencil, mark the tile on the paper (the stuff that covers the adhesive).
2b. You should cut it on the paper side as well. Use the straight edge and utility knife and make several slices along the same line until you have made it through enough that you can bend/break the rest of it in a straight line. (I just looked online for a good tutorial and didn't find one but I did read several places that indicated it helpful to heat your tile using a hair dryer - I haven't done it but you can certainly try it.)

3. Peel the paper from the tile and place your picture(s) on the adhesive side.
3a. Smooth the pictures so there are no bubbles.
3b. Use the utility knife to trim the pictures so that they are flush with your tile.
4. Decide how long you want your ribbon to be and cut it. You will be folding it over entirely so take that into consideration.

5. Loop the ribbon through the D ring and pin it like this:

6. Using your zipper foot, sew as close to the ring as you can get. If you don't like to sew, you can think of another way to enclose the D ring. Perhaps you could use fusing tape (Stitch Witchery) and iron the two pieces of ribbon together.
7. Adhere the ribbons to the backs of your tiles and hang. (I honestly used Scotch tape - several pieces - to do the job.)

8. Hang on a wall in whatever fashion you want.